How to Prime a Coil: A Beginner’s Guide
When the taste and quality of hits while vaping begins to decline, it’s probably time to replace the coil of the vape. Each device is a little bit different when it comes to how to change the coil- some require the entire device to be taken apart, others are a quick two- step replacement. One thing that is universal is the need to prime coils before vaping for the first time.
Priming the coil gives users the best, most flavorful vaping experience and keeps the vape running at optimal performance. Find out more about what exactly it means to prime a coil, why it’s important, and step by step instructions on how to prime it properly.
Table of Contents
- Knowing when to replace the coil
- What exactly does it mean to prime?
- Benefits and importance
- Step by step guide
- Is it worth it?
Table of Contents
When to Change Coils
Every vape user is familiar with needing to replace their atomizer’s coil. As the vape is used, quality of the vapor production will decrease and the vapor flavor will get less intense- both of which are indicators that the coil is beginning to age.
Users know they need to replace their coils when they begin to experience a burnt taste when they use their vape. Changing coils differ for each vape. Some coils can be replaced using a simple two-step method, while others might involve taking apart the entire atomizer and tank.
What Does It Mean to Prime Coils?
The simplest definition of priming an atomizer’s coil is saturating the it’s cotton with e-liquid before using the vape. Pre-saturating the cotton can be done either outside of the atomizer, or with the coil already in place. The most important part of priming is that the entire wick gets saturated with e-liquid. If the wick is dry, it will produce burnt hits and will keep the vape from performing at an optimum level.
The simplest definition of priming an atomizer’s coil is saturating the it’s cotton with e-liquid before using the vape. Pre-saturating the cotton can be done either outside of the atomizer, or with the coil already in place. The most important part of priming is that the entire wick gets saturated with e-liquid. If the wick is dry, it will produce burnt hits and will keep the vape from performing at an optimum level.
Importance of Priming
Pre-saturating an atomizer’s coil helps prolong the life of the coil and gives users the best tasting e-juice experience possible. Saturating the wick with e-liquid before vaping ensures that the wicking material will not overheat during use, preventing burnt hits and maintaining a top quality vape.
Many vape users are familiar with the nasty, charred taste of a burnt hit and want to avoid it at all costs. Priming helps prevent this by keeping the wick moist, which makes the atomizer heat up the e-liquid rather than the cotton. Vapor flavor intensity is also amped up when the wick is primed. Because the cotton is saturated with e-liquid before the first hit, users are given an intense rush of e-juice vapor flavor from the beginning of their vape session. They do not have to take a few dry hits before hitting a flavor groove, they can simply prime and go.
Arguably the most important reason to prime the atomizer’s coil is that it prolongs its life. Priming coils essentially ensures that the wick is “broken in” from the first draw, drastically reducing the likelihood of burnt hits. Burnt hits decreases the lifetime of the wick and burns the atomizer’s material, rather than the e-liquid. A primed coil extends its lifetime and makes it run as perfectly and efficiently as possible.
How to Prime a Coil
It is easy to see why priming a coil is so important. It extends the lifetime of the coil, as well as keeps e-liquid tasting fresh and the quality of the vape high. The process of priming can be a little tricky for beginners, so here are step by step instructions on how to properly prime an atomizer coil.
- Remove old coil
- Replace with a new coil
- Saturate the wick
- Know when to stop
- Siphon the e-liquid
- Start low
- Happy vaping
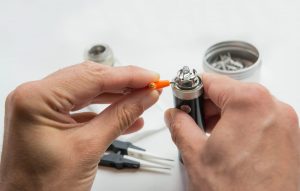
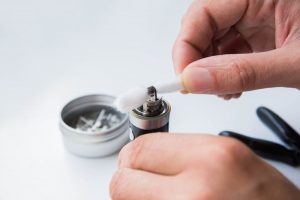
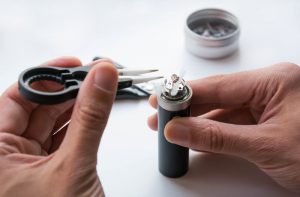
Identify when the coil needs to be replaced. Users can tell when a replacement is necessary because the taste will start to get less intense and they might begin to get a slightly burnt taste when they vape. Once it tastes charred, it is time to replace the coil. Open up where the coil is located and remove it from the atomizer and tank.

Have a new coil out and ready to go. It should not have any e-liquid on it yet. This step is simply to put it into the atomizer. Every vape is different, so be sure to read the owners guide and follow the directions on how to put in a new coil.
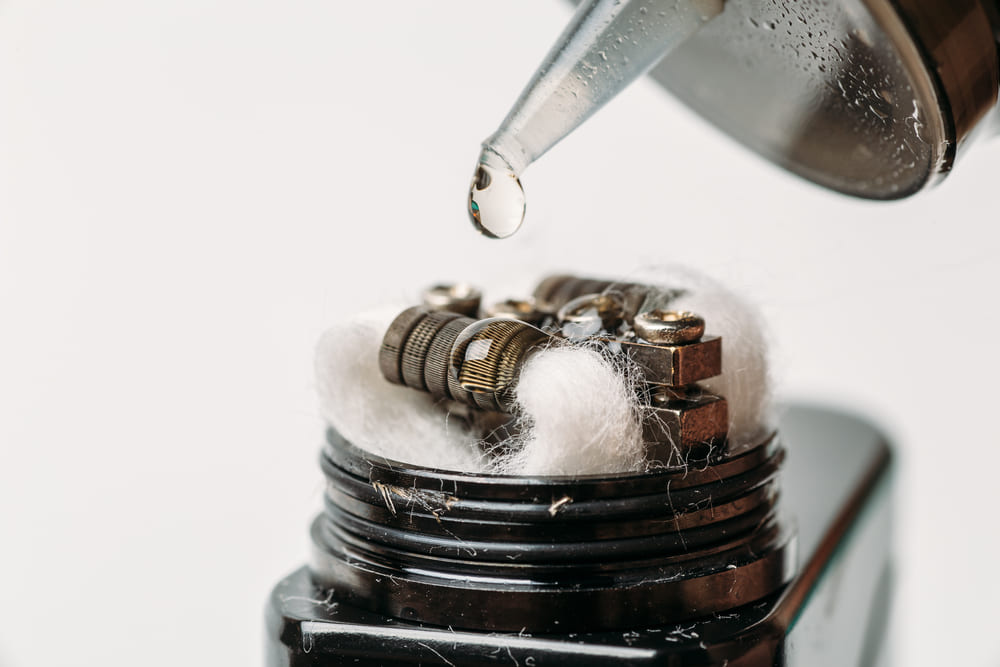
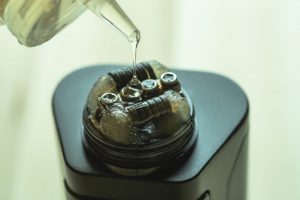
The third step is where e-liquid is placed onto the wick. Ensure that the coil is securely attached to the vape. This keeps e-juice from getting on the user’s fingers or surrounding area and prevents e-liquid waste.
Examine the atomizer and find where the wick meets the e-juice tank when vaping. Depending on the vape, this should be near the bottom of the wick or somewhere near the tank. Saturate the wick by placing drops of e-juice into these juice holes. The amount of e-liquid needed to fully saturate the wick varies for each vape, but a good rule of thumb is to put a drop into each juice hole and continue placing e-juice one drop at a time until the wick appears saturated.
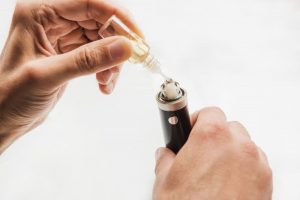
Once the cotton wick stops quickly absorbing the drops, the wick is saturated and does not need any more drops of e-liquid. Adding too much e-liquid could cause the cotton to become oversaturated, resulting in flooding. When the coil is flooded, it makes it more likely that the user will get e-juice in their mouth, which is not a pleasant experience.
After saturating the cotton, reassemble the atomizer and fill the tank with e-juice. Once reassembled, take four or five drags without pressing the firing button. This is referred to as taking dry hits and works to bring more e-liquid from the tank and into the cotton of the wick. Taking a few dry hits helps fully saturate the coil, but be careful as taking too many will bring too much e-juice into the cotton and cause the coil to flood.
When using a new coil for the first time, it is important to break it in. Users shouldn’t start firing at full power and highest temperature right off the bat. Start vaping with a new coil at a lower temperature and a lower power for a few hits and steadily increase until the desired temperature/power is reached. This makes it so e-liquid comes up to the coil from the tank, fully saturating the coil and preparing it for higher intensity vaping.
Once the coil is broken in, the vape is ready for use at whatever settings the user wants. Users can continue vaping like usual knowing that their coil was adequately primed.
It is easy to see why priming a coil is so important. It extends the lifetime of the coil, as well as keeps e-liquid tasting fresh and the quality of the vape high. The process of priming can be a little tricky for beginners, so here are step by step instructions on how to properly prime an atomizer coil.
- Remove old coil
- Replace with a new coil
- Saturate the wick
- Know when to stop
- Siphon the e-liquid
- Start low
- Happy vaping
Identify when the coil needs to be replaced. Users can tell when a replacement is necessary because the taste will start to get less intense and they might begin to get a slightly burnt taste when they vape. Once it tastes charred, it is time to replace the coil. Open up where the coil is located and remove it from the atomizer and tank.
Have a new coil out and ready to go. It should not have any e-liquid on it yet. This step is simply to put it into the atomizer. Every vape is different, so be sure to read the owners guide and follow the directions on how to put in a new coil.
The third step is where e-liquid is placed onto the wick. Ensure that the coil is securely attached to the vape. This keeps e-juice from getting on the user’s fingers or surrounding area and prevents e-liquid waste.
Examine the atomizer and find where the wick meets the e-juice tank when vaping. Depending on the vape, this should be near the bottom of the wick or somewhere near the tank. Saturate the wick by placing drops of e-juice into these juice holes. The amount of e-liquid needed to fully saturate the wick varies for each vape, but a good rule of thumb is to put a drop into each juice hole and continue placing e-juice one drop at a time until the wick appears saturated.
Once the cotton wick stops quickly absorbing the drops, the wick is saturated and does not need any more drops of e-liquid. Adding too much e-liquid could cause the cotton to become oversaturated, resulting in flooding. When the coil is flooded, it makes it more likely that the user will get e-juice in their mouth, which is not a pleasant experience.
After saturating the cotton, reassemble the atomizer and fill the tank with e-juice. Once reassembled, take four or five drags without pressing the firing button. This is referred to as taking dry hits and works to bring more e-liquid from the tank and into the cotton of the wick. Taking a few dry hits helps fully saturate the coil, but be careful as taking too many will bring too much e-juice into the cotton and cause the coil to flood.
When using a new coil for the first time, it is important to break it in. Users shouldn’t start firing at full power and highest temperature right off the bat. Start vaping with a new coil at a lower temperature and a lower power for a few hits and steadily increase until the desired temperature/power is reached. This makes it so e-liquid comes up to the coil from the tank, fully saturating the coil and preparing it for higher intensity vaping.
Once the coil is broken in, the vape is ready for use at whatever settings the user wants. Users can continue vaping like usual knowing that their coil was adequately primed.
Priming a Coil: Easy and Effective
To prime vape coils means to saturate the cotton wick in e-liquid before vaping. This process of saturating a fresh coil in e-liquid prevents burnt hits and provides top quality vapor flavor. It is so important for the coil’s longevity and for the user’s overall vaping experience. It prevents burnt hits and provides intense vapor flavor while ensuring a longer lasting coil.
Priming is easy to do and makes a world of difference to the overall quality of the coil. Something that takes as short as two minutes can extend the life and use of the coil by days and increase the vapor flavor during vaping by tenfold.

Comments
Leave a comment